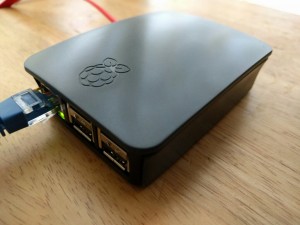
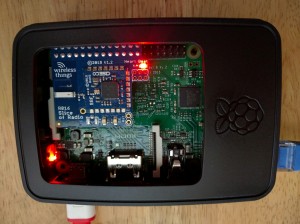
After all the issues migrating Wheezy over I decided to start from scratch with the Pi 3 and my wirelessthings sensors. This guide is pretty poorly written but is step by step everything I did. it assumes you have no mouse, keyboard or monitor attached.

Prepare the Pi:
1. Download the latest Raspbean Jessie Image and Using your favourite method, prepare your SD card using the downloaded image for the Pi (I used Apple Pi Baker other GUIs are available).
2. Plug an ethernet cable into the Pi and connect to a router serving DHCP and Boot your Pi using the newly prepared SD card.
3. Using a network scanner (or login to your router) to determine the IP address of your Pi, I use fing on my smartphone.
4. Log into the pi using SSH in OSX type
SSH pi@IP Address
and use the password “raspberry”
5. type
sudo raspi-config
select Internationalisation Options and set your timezone then go into Advanced options and turn ON serial! Exit raspi-config and reboot your Pi when prompted
It is good practice to expand your filesystem at this point however I haven’t found raspi-config GUI very good at this so run:
raspi-config --expand-rootfs and reboot when finished
6. SSH back into your pi run:
sudo apt-get update
sudo apt-get upgrade -y
7. Change the default password! type
passwd
and enter your old password followed by your new one as prompted!
Configure VNC:
1. to Install VNC Viewer type
sudo apt-get install tightvncserver
2. If you want to change the VNC port type
sudo nano /usr/bin/vncserver
find the line
$vncPort = 5900 + $displayNumber;
and change 5900 to the port you want to use, I use 59000 which equated to 59001 in real life. Press Ctrl>X, Y, Enter to save and exit nano
3. To make VNC run from boot you need to create a script, type
sudo nano vnc.sh
paste the following into it;
#!/bin/sh

vncserver :1 -geometry 1920x1080 -depth 24 -dpi 96
save and exit nano, type
sudo chmod 755 vnc.sh
then type
./vnc.sh
and you will be prompted to enter a VNC password.
Type
sudo nano /etc/rc.local
add these lines after the commented section
# Auto run VNC

sudo /home/pi/./vnc.sh &
save and exit nano, reboot and VNC should now run from startup!
4. You can now connect to your Pi using VNC! so VNC into your Pi and set a static IP using the network settings GUI in the top right of the screen and reboot, the next few steps can be done through SSH or terminal in VNC its up to you.
Configure Webserver and PhpMyadmin:
1. install apache server
sudo apt-get install apache2 apache2-doc apache2-utils -y
then install support packages
sudo apt-get install libapache2-mod-php5 php5 php-pear php5-xcache -y
finally install php mysql connectivity
sudo apt-get install php5-mysql -y
2. install mysql server
sudo apt-get install mysql-server mysql-client -y
you will me prompted for a mysql password during installation.
3. install phpmyadmin
sudo apt-get install phpmyadmin -y
when prompted select yes and enter the password you chose above, then specify a phpmyadmin password.
4. we now need to configure phpmyadmin
nano /etc/apache2/apache2.conf
scroll to the bottom and add the following line
Include /etc/phpmyadmin/apache.conf
save and exit nano
5. Restart apache
sudo /etc/init.d/apache2 restart
and you should be good to go!
Setup Shares:
1. we are going to setup samba shares to make moving scripts etc easier, so install samba
sudo apt-get install samba samba-common-bin -y
2. once installed type
sudo nano /etc/samba/smb.conf
scroll down and make sure you have the correct workgroup (I just use WORKGROUP) and that Wins Support is enabled.
3. to be safe you should only add your pi user so type
smbpasswd -a
and enter your desired password, if you do want to add the root user type
sudo smbpasswd -a
4. to add shared folders type
sudo nano /etc/samba/smb.conf
and at the bottom add the code:
[www]

comment=www Share

path=var/www/

browseable=Yes

writeable=Yes

only guest=no

create mask=0777

directory mask=0777

public=no
[RootFolder]

comment=Root Folder Share

path=/

browseable=Yes

writeable=Yes

only guest=no

create mask=0777

directory mask=0777

public=no
5. You should now be able to connect to these shares using standard UNC paths from your windows or macintosh computers
Setup the “Slice of Radio” (Wireless message bridge)
Beacuse of a change to the way the Pi 3 uses Uart, we need a workaround to get the Slice of radio working.
1. type
sudo nano /boot/config.txt
and add
# Change device tree to enable slice of radio

dtoverlay=pi3-miniuart-bt
to the end of the file then reboot
sudo reboot
2. we now need to disable the serial prompt in a non standard way so type
sudo nano /boot/cmdline.txt
comment out the line in this file and add:
dwc_otg.lpm_enable=0 console=tty1 root=/dev/mmcblk0p2 rootfstype=ext4 elevator=deadline fsck.repair=yes rootwait
Save and exit nano
If you haven’t installed your slice of radio yet, shut down your Pi and fit it
sudo shutdown 0 otherwise reboot the Pi sudo reboot

gksudo python LaunchPad.py
to fire it up. (using gksudo rather than sudo fixes display 0.0 errors caused by running X programs on VNC, you may not need this if using a monitor.)
4. In LaunchPad, Click on message bridge and hit start wait a second, then click on Configuration wizard (ignore the message stating “Message bridge not found”) then select “serial” in the next window you can configure your sensors, press the configure button on a sensor for one second, wait for it to communicate with wireless bridge and follow the on screen setup, repeat for each sensor. Once you are finished exit LaunchPad
5. next we install minicom to test communication with your sensors is working correctly so type
sudo apt-get install minicom -y
once installed we need to run
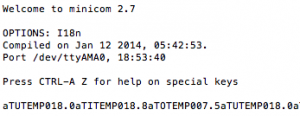
minicom -b 9600 -o -D /dev/ttyAMA0
This will open minicom and if all is well you will see your sensors responding, remember they will only report as often as you have told them to so you may need to be patient! Exit minicom when you are happy that the sensors are responding.
Ctrl A, X
BACKUP your SD Card:
At this point I’d recommend backing up your SD card image and archiving it:
Apache2 optimisation:
you can disable unused modules to speed up apache2, I disabled these but it’s made no difference.
sudo a2dismod autoindex -f

sudo a2dismod auth_basic -f

sudo a2dismod status -f

sudo a2dismod deflate -f

sudo a2dismod ssl -f

sudo a2dismod authz_default -f
Summary
Thats kind of it for configuration, you now have a Pi 3 running the latest Raspbian, you have sensors attached and reporting, you have a webserver installed, mysql, php and python so you can do with it what you like!
Originally I followed this project to get me going http://www.lourenco.eu/temperature/instructions.html but I have since ditched it in place of my own version.
References:
http://www.briandorey.com/post/Raspberry-Pi-3-UART-Boot-Overlay-Part-Two
https://www.stewright.me/2012/09/tutorial-install-phpmyadmin-on-your-raspberry-pi/
https://www.raspberrypi.org/

To add a user to samba try:
sudo smbpasswd -a pi
This adds user ‘pi’.